
Understanding Electrical Requirements for Home EV Chargers
Installing a home electric vehicle (EV) charger is one of the smartest upgrades a homeowner can make in today’s rapidly electrifying world.
Installing a home electric vehicle (EV) charger is one of the smartest upgrades a homeowner can make in today’s rapidly electrifying world. For anyone considering a Level 2 charging station, understanding the electrical requirements is essential—not just for efficiency but also for safety, compliance, and optimal charging performance. This in-depth, professional guide explores all aspects of residential EV charging from an expert perspective, ensuring neither technical details nor practical insights are missed.
EV Charging at Home: The Essential Overview
Modern homeowners enjoy greater convenience, cost savings, and vehicle range confidence by installing in-home charging. With the U.S. push toward cleaner transportation, robust home charging infrastructure is more important than ever. The process is more complex than plugging in an appliance; it intersects with local building codes, electrical capacity, and future-proofing for evolving EV technology.
Types of Home EV Chargers: Levels Explained
A crucial first decision is the charger type:
| Charging Type | Power Requirements | Charging Speed | Use Case |
|---|---|---|---|
| Level 1 | 120V AC | 3–5 miles/hour | Basic, slow, overnight |
| Level 2 | 240V AC | 12–80 miles/hour | Daily, high-speed home use |
| DC Fast | 480V+ DC | 60–100 miles/20 min | Commercial, highway only |
Level 1 chargers plug into standard outlets and are best for minimal, overnight top-offs.
Level 2 chargers require dedicated 240-volt circuits and deliver much faster charging—enough for typical daily use in a few hours.
DC Fast Chargers are rare in residences due to their industrial power draw and cost.
Assessing Your Home’s Electrical Infrastructure
Before purchasing a charger, homeowners must evaluate current electrical capacity. Most modern homes have panels rated between 100 and 200 amps. The addition of a Level 2 charger, which draws significant continuous power for hours each night, may require reviewing whether the main panel and wiring are sufficient or if upgrades are needed.
What the Electrician Looks For:
Panel amperage: Older homes may have 60–100-amp panels, while most new builds are 200 amps.
Existing circuit load: The panel must support EV charging in addition to existing appliances.
Panel space: Enough slots must be available to add a new 240-volt breaker for the charger.
Condition of wiring: Outdated or overloaded wiring can be a fire hazard and may require replacement.
A certified electrician will perform a load calculation to ensure compliance—and may recommend a service panel upgrade if necessary.
Circuit and Wiring Specifics
A Level 2 charger installation is not a plug-and-play process. It requires:
Dedicated 240V Circuit: Sized for the charger’s amperage, usually between 30 and 50 amps.
Proper Wiring Gauge: Heavier wiring is required for higher current (often #8 or #6 AWG copper, based on code and run length).
NEMA Outlet or Hardwired: Most plug-in models use a NEMA 14-50 or 6-50 outlet; hardwired units are directly connected for permanence and, in some areas, required by code.
Safety Upgrades: Installation may need extra protections, including Ground-Fault Circuit Interrupters (GFCI), surge protection, or arc-fault protection as dictated by local regulations.
Location, Permits, and Code Compliance
Local codes are crucial. Most municipalities require a permit for EV charger installation to verify compliance with the National Electrical Code (NEC) and local safety requirements.
Permit Process: Always confirm with the building department and utilities. Many cities and counties have specific protocols for residential EV charging.
Installation Site: Shorter cable runs reduce efficiency loss and cost; the charger should be near the vehicle’s parking spot, with consideration for future vehicle needs.
Indoor or Outdoor: Outdoor chargers and outlets must be rated for weatherproofing (NEMA 3 or higher)
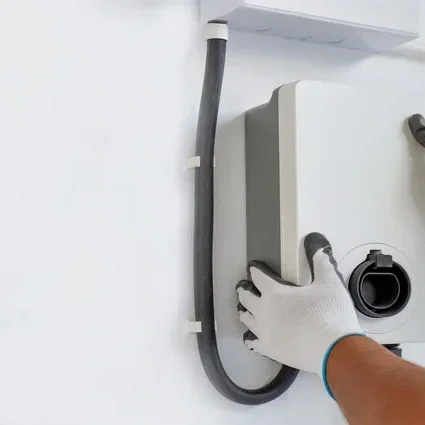
Professional Installation: The Step-by-Step Process
A streamlined professional process looks like:
Site Assessment
An electrician inspects electrical capacity, recommends upgrades (if needed), and identifies the optimal charger location.
Permit Application
Handle paperwork with the city/county and utility company, ensuring all local requirements are met.
Panel or Service Upgrade (if required)
Upgrade the main panel or, less commonly, the exterior service line to the house.
Dedicated Circuit Installation
Add a new breaker, route wiring, and install an appropriate outlet or hardwire connection.
Mounting the Charger
Securely install the charger, keeping all manufacturer guidelines and accessibility in mind.
Final Inspection and Testing
The local authority inspects the work; the installer tests operation, wiring integrity, and charger performance.
Ongoing Support
Professional contractors often provide guidance on using smart features, including Wi-Fi setup, app integration, and safety checks.
Safety First: Why Professional Installation Matters
Professional installation ensures correct circuit sizing, safe grounding, and code compliance.
Incorrect installation poses fire risks, electric shock danger, and possible voiding of equipment warranties.
Insurance may not cover incidents resulting from improper, unpermitted installation.
DIY work is strongly discouraged beyond surface-level site prep or charger mounting (if explicitly allowed by the manufacturer and jurisdiction).
Smart Features and Future-Proofing
Many Level 2 chargers now include smart technology for scheduling, energy monitoring, and integration with home automation:
Wi-Fi and App Control: Remotely monitor charging, set schedules for off-peak rates, track energy use.
Load-Sharing: For multiple EVs, some systems offer dynamic load management to balance power between vehicles or with household demands.
Utility Programs: Some utilities offer incentives or rebates for smart, grid-connected chargers, as well as time-of-use (TOU) rates—be sure to check for local offers.
Costs to Expect
While costs vary by location, equipment, and home size:
Level 2 Charger Hardware: $400–$900 (mid-range units with smart features)
Professional Installation: $500–$2,500 (depending on complexity, panel upgrades, and wiring length)
Permit Fees: $50–$300
Panel Upgrades (if needed): $1,500–$4,000+
State and federal incentives, utility rebates, or manufacturer offers can help offset costs. Always check with local agencies or utilities for up-to-date offers.
Expert FAQ: EV Charger Electrical Requirements
What types of home EV chargers are available?
Level 1 (120V): Uses a standard household outlet, no dedicated circuit required, charges 4 to 5 miles per hour.
Level 2 (240V): Requires a dedicated circuit and 240V outlet or hardwiring, charges 20 to 30 miles per hour. This is the most popular option for Arizona homes, balancing speed and cost.
DC Fast Chargers: Rare for homes due to high power requirements and cost; mostly for commercial use.
What is the minimum panel size for home EV chargers?
A 200-amp panel is ideal for Level 2 and future-proofing, but a 100-amp panel may be sufficient for smaller setups after a professional load calculation.
Always have a licensed electrician check your panel capacity before proceeding—older homes may require upgrades.
Do all home EV chargers need a dedicated circuit?
Yes, all Level 2 home chargers require a dedicated 240V circuit sized at least 125% of the charger’s maximum current for safety and code compliance.
Dedicated circuits prevent overloading and extend the life of charging equipment and home wiring.
What outlet is required for plug-in Level 2 chargers?
The most common plug-in outlet is NEMA 14-50 (240V, 50A), used for ranges and RVs. Some chargers use NEMA 6-50 or NEMA 14-30, so always check compatibility.
Hardwired chargers are connected directly to the breaker panel by an electrician.
Can indoor and outdoor chargers be interchanged in Arizona?
Not always. Choose outdoor-rated chargers (NEMA 3 or higher) for uncovered installations—critical in Arizona’s hot, dusty climate.
Outdoor outlets may also require GFCI protection per local safety codes.
What permits and inspections are required for home EV chargers in Arizona?
A permit is required for new 120V or 240V circuits, and a licensed electrician must apply.
Homeowner/commercial association rules may apply in Scottsdale, Phoenix, or other localities. Installation must be inspected after completion for safety and code compliance.
How long does installation take?
Standard Level 2 installations take one day if your panel supports the charger and no extensive upgrades are needed. Panel upgrades or longer wire runs may require additional time.
Are rebates or incentives available in Arizona?
Rebates, tax credits, and utility incentives are available but vary by area and utility provider. Some may require certified equipment or installation.
Local utilities sometimes offer Time-of-Use (TOU) rates for smart charger systems to save on charging costs.
How can homeowners future-proof their installation?
Install at least a 50-amp circuit for faster charging and future vehicle support.
Consider smart panels, dual chargers, or models supporting software updates for flexibility.
Plan for more EVs or changing vehicle needs by consulting with a professional upfront.
Partnering with the Right Professional
Installing a home EV charger is a significant upgrade, directly impacting both daily usability and property value. Only a professional, code-compliant installation ensures lasting safety, reliable performance, and eligibility for utility incentives and warranty support. The best path forward is always through a licensed electrician or electrical contractor specializing in Scottsdale EV charger installations—delivering both peace of mind and a seamless transition to electric driving.
Get prompt and dependable electrical solutions with Apollo Electric. Serving the residential and commercial clients in the Phoenix area, our licensed electricians offer comprehensive EV charger installation, lighting and LED installation services, electrical repairs and troubleshooting, and smart home wiring and automation. We are committed to ensuring safety of electrical systems in homes and businesses. Get your free estimate today.